|
I've decided to start a new blog series I call Asset Reflection, so that I can look back on the process of making a model, and try to understand what I did right, and what I did wrong, and hopefully try to show people some new techniques for 3D Modeling. I was thinking of starting off this blog series with my Toy Skateboard model, but I don't feel that would be the most interesting model to discuss. It would just be two sentences of me describing how I extruded a plane and used a couple different modifiers to build the body of the skateboard, and two paragraphs of me desperately explaining why it took me five days to create the metal plates you can see under the skateboard you probably didn't notice in my 'Man Doing Skateboard' image. Instead, I decided to do an asset reflection on my lamp which, while I don't think looks better than my skateboard, is a bit more interesting once you look under the hood. 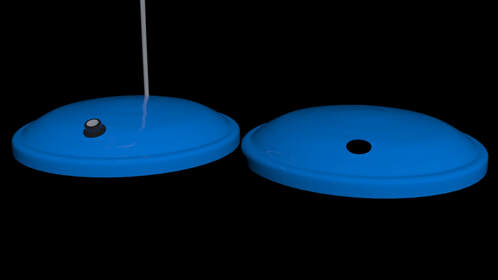 Let's start with the base of the lamp. It was fairly basic making it, I just did the extruding a cylinder trick we learned while making the fire hydrants at the start of the year, and welded all the vertices once I reached the top. One thing I do wish I did was to use support loops in conjunction with the CreaseSet modifier. I made this model when I had just learned about CreaseSet, and completely stopped using support loops in favor of the modifier, but I hadn't stopped to think about why support loops are used in the first place. They're called support loops because they help support the model, and define edge flow. I will try to keep that in mind for future models. Now let's move on to the most interesting part of this model, which you might not have thought would be with just a quick glance. This knob. Let's start with the obvious problem, the distortion towards the bottom of the image. There was a problem while attaching the knob to the lamp. It might have been because the knob wasn't level with lamp, it might have been because two edges were too close, it's definitely a case of bad topology, so I'll be sure to watch out and take notice the next time something like this happens. Now we move on to the interesting stuff. 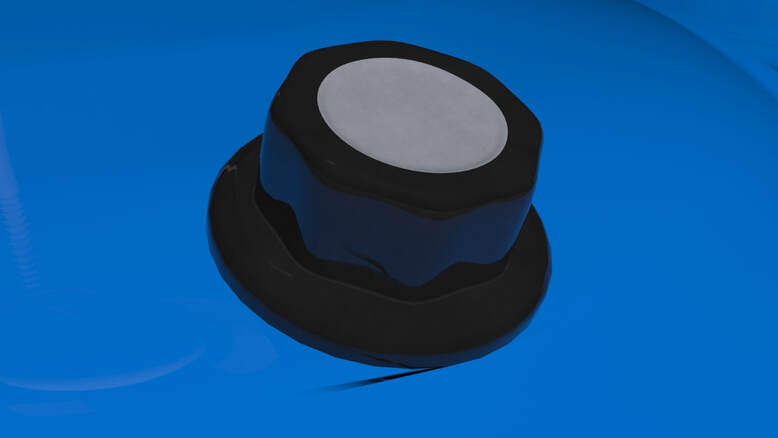 This knob. Let's start with the obvious problem, the distortion towards the bottom of the image. There was a problem while attaching the knob to the lamp. It might have been because the knob wasn't level with lamp, it might have been because two edges were too close, it's definitely a case of bad topology, so I'll be sure to watch out and take notice the next time something like this happens. Now we move on to the interesting stuff. I thought that creating this model would be the perfect time to start practicing working on my topology. I made two cylinders. One that formed the base of the knob, and one that formed the... squiggly part at the top. I described it as a sort of starr-ish shape in my presentation because I didn't know how to describe and I still don't so I'll just call it the top half. The only thing you need to know about it is that I created it with twice as many sides as I did the first cylinder.
1 Comment
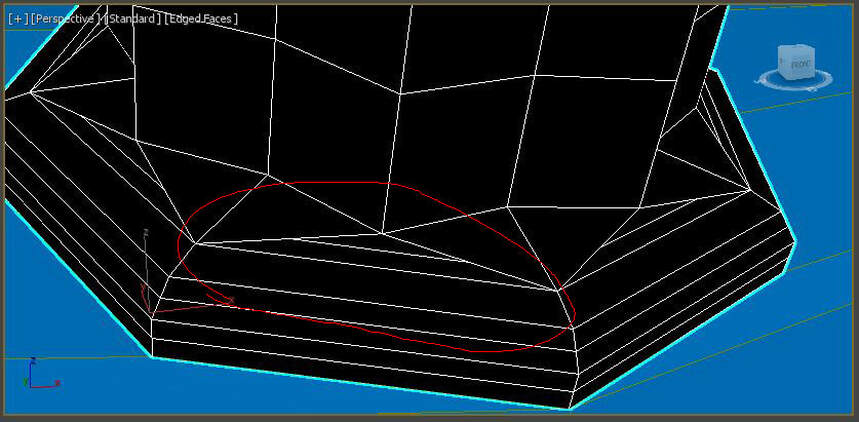 To start, I lined up the two cylinders, and for the top one, I took every other edge going down the side of the cylinder, and scaled them down to get the desired squiggly effect. The next thing to do was to figure out how to mesh the two meshes together. I found a handy dandy guide on loop reduction which helped me learn how to take two faces, and convert them to one without messing up the topology, which I then applied to the knob. I'm quite proud for being able to do this, and will try to note what other useful applications I can use this for. The entire website helped me understand topology, and how to re-topologize far better than I had before. Which brings us to the final two elements of the model. 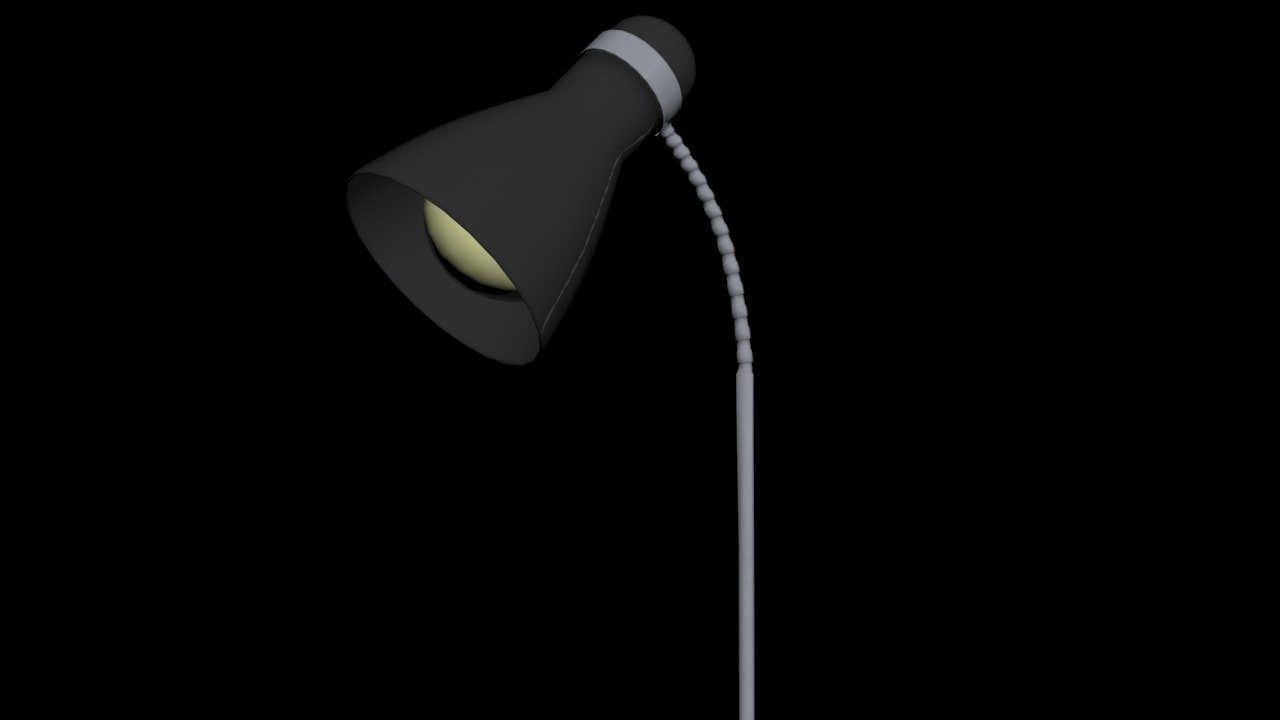 The arm (spine), and the shade (cone). My tragic use of the default lighting aside, the arm and the spine especially are the two parts of this model that I have the least amount of good things to say about. The shade was the same thing as the base of the lamp. Extrude the cylinder, although I did throw a shell modifier on top of this one to give it a bit more... depth? Just a part of the model that I don't really have much to say about. But when we look at the arm, the we can see where my lack of support loops came to bite me in the end. Or maybe not. I don't know if not using support loops is what caused this. All I do know is that slapping a CreaseSet modifier on to the arm was not enough. I was hoping for a more defined, box like shape instead of the curvy, smooth mess here. Maybe it's passable. You don't really notice a detail like this when playing the parkour game I designed it for. So maybe it's passable? But then you look at the back.  I don't know about you, but I consider this a complete failure on my end. I hadn't noticed the backside until I was much further into the creation of this lamp, and the only reason I didn't do it over was because of the perspective of my parkour game. You're always on the same level as the lamp, looking up at it. If my game were from a normal perspective, I probably would have thrown out the model and started it over with all I had learned. It would probably only take about an hour at most, but I am glad I don't have to. Overall, I am very conflicted with how I feel about this model. It is a product of my advancements in 3D Modeling, but it also has one of biggest missteps so far with game development. That's everything I have to say about my model, but I still have one more thing to say. If you want to advance your 3D Modeling skills, I would suggest watching speed modeling videos, slow them down, and try to process what it is that the modelers are doing. It's how I learned many of the techniques I use to this day. Like this violin modeling video. It was the first speed modeling video I ever watched, and analyzing it taught me so many new techniques to use. There are also many really great channels to consult if you ever need help with anything. Such as Arrimus 3D. His back catalogue is absolutely massive, and he has videos on just about every topic under the sun. Not much else to say. Peace out.
|
AuthorHello, my name is Simon Sanchez. I will be writing things about my work and other things in this blog. Archives
May 2022
Categories |
 RSS Feed
